There are tons of cloud services providing storage to those who take lots of photos on their smartphone. Which means of backup service is suitable for you? Here, you will discover some of the best ways to backup iPhone photos.
iCloud Photo Library
iCloud Photo Library is one of the many cloud services on the internet, providing 5 GB of free storage to backup photos. It is Apple’s proprietary backup and sync service. Not only images, but you can also backup any media on the iCloud Photo Library. It provides the best solution for quick sync of local storage to the cloud and offers a facility to share content with a family member. To start with the iCloud Photo Library, you need to register to the same iCloud account you have registered on your iPhone.
iCloud Photo Library stores the full resolution images without lowering the contrast and saturation. Similarly, downloaded contents from iCloud Photo Library offers the original resolution. The iCloud Photo Library works along with Apple’s photo app to store media on the cloud. The library manages the photos based on years, months, and weeks which should come in handy during searches.
Let Apple handle the backup for you; iCloud Photo Library is one of the recommended methods.
How to Setup iCloud Photos
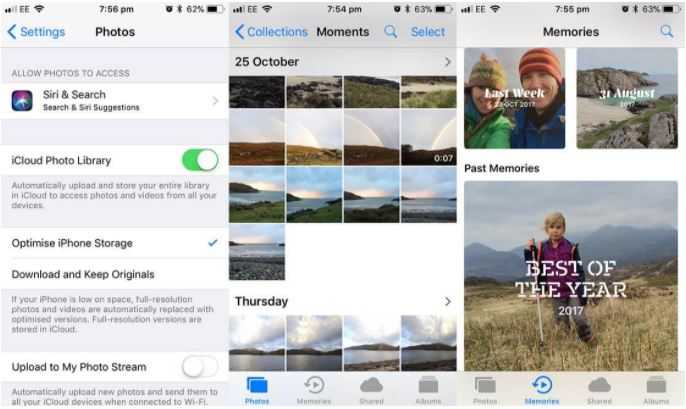
Step 1: Go to iPhone’s setting and then to your iCloud profile.
Step 2: Find iCloud settings and tap on it.
Step 3: Now, tap on photos and toggle it to turn on the iCloud Photo Library.
Use Alternative Backup Services

Here, the concept of backing photos from your iPhone is similar to the previous method, but here we are using Google Drive, Dropbox, or Mega. Besides iCloud offers 5 GB of limited storage to backup photos, Google Drive offers 20GB of free space; similarly, Mega offers 50 GB of free space, and Dropbox offers 2GB of cloud storage.
The ideas of backing up iPhone photos to these cloud services are similar. To start with, follow the guidelines below.
Step 1: Sign in to any of these cloud services account. Here are links to the respective services:
Step 2: Now, after all, set, go to the dashboard of the service, and start importing your iPhone photos.
Step 3: Turn on Backup and Sync service while allowing iPhone storage permission.
If you are short on iPhone storage, you can delete photos from the local storage after the backup. These services allow us to view and share media as well.
Backup iPhone photos to the computer

While the iPhone has insufficient storage for hard-core photographers, many prefer backing up the photos to the computer storage. Transferring iPhone photos to the computer takes no mastering. Simply plug in the USB cable to your computer and copy it somewhere you can find.
Also, if you are using MacBook, you can use AirDrop to quickly transfer iPhone photos to Mac wirelessly. The computer’s local storage saves the exact resolution photos without distortion, while some cloud services may deform detail and contrast.